One of the most important features within any online community are groups. Through them, you can create a link between multiple members of the community to generate content and create interactions within the site. It does not matter if it is an organization, university, entrepreneurship, etc. In essence, the purpose of the groups will be the same, to create a connection between multiple members.
In BuddyPress/BuddyBoss creating a group is extremely simple. First of all, you must make sure that this component is active, for this you must go to Settings > BuddyPress > Components or BuddyBoss > Components and check the Social Groups option, as shown below:
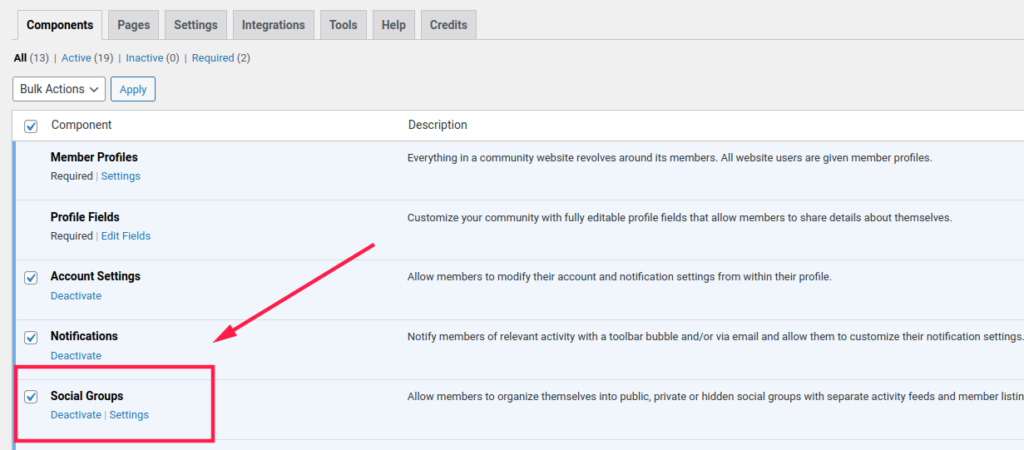
Once the component is active, to create a new group you must click on Groups > New group, enter the required information and press Publish. You do not need anything else, with this you will be able to see the group listed within the tab BuddyBoss/BuddyPress Groups. If you want to get detailed information about this important component, you can get it by visiting the official site through the following links:
BuddyPress groups – BuddyBoss groups
Ok, this component is used frequently on my site. How can I generate a paid group?
Before going into detail about how to enable group sales, we must define the platform that we will use to carry out the purchase/sale process. In our case, we will use WooCommerce as a link platform between seller/buyer since it is the most common tool within WordPress for the creation of stores and e-commerce in general. Like BuddyPress this is a free plugin so it can be easily installed by clicking Add New on the plugins screen:
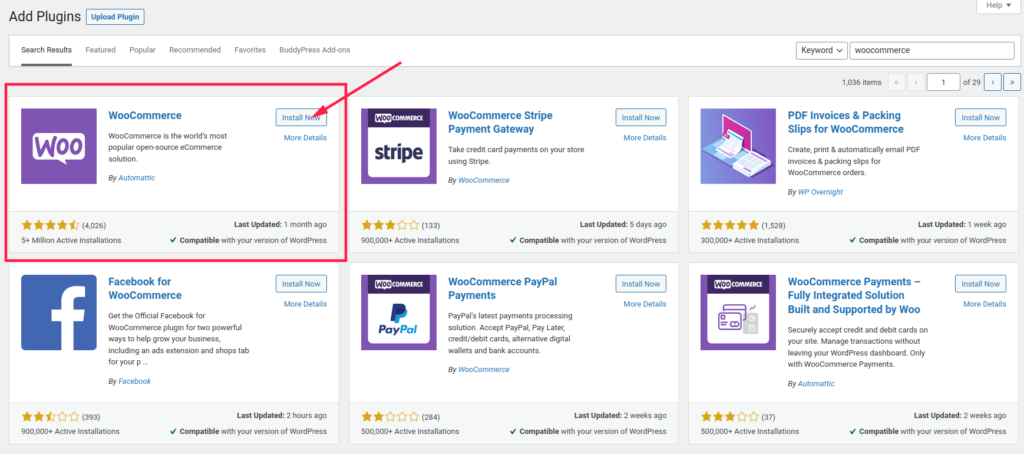
On their website you can find detailed information about the installation and configuration of the store:
Once you are done with the installation and activation of BuddyPress/BuddyBoss and WooCommerce, the next thing to do is to install our WooBuddy plugin and the WooBuddy Groups extension. The first allows you to manage the WooCommerce store process directly from the BuddyPress user profile. The WooBuddy Groups extension is intended to link the registration process of a group with a WooCommerce product. In other words, for the user to be part of a group, they must first formalize the purchase of a product or subscription.
So, the steps to follow to enable the payment to be able to register within the group are the following:
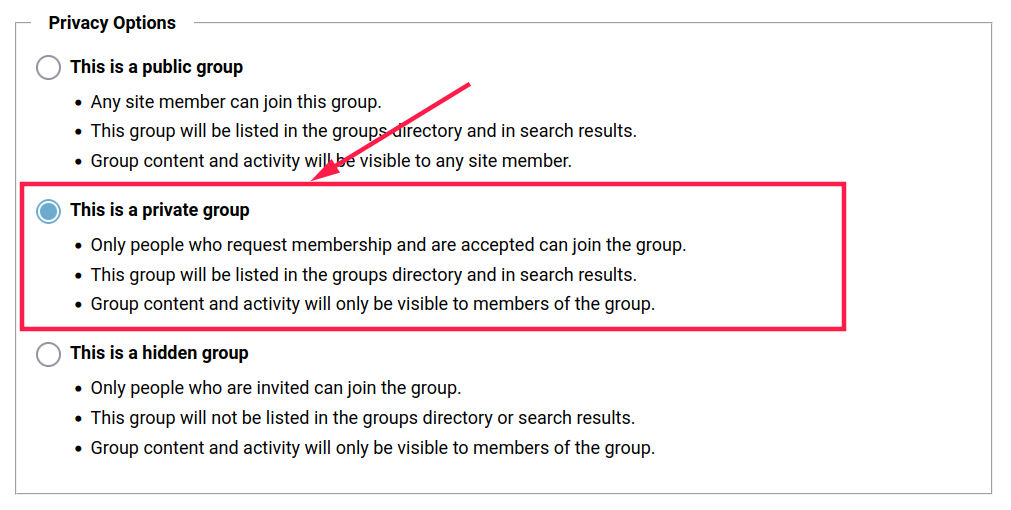
1. Set the group as Private
When you are creating the group, within its settings, we recommend specifying that it is a private group to have greater control over the content generated.

2. Create a new product and link it with the group
You will have to click on Products > Add new and enter the required information about the product (name, description, price, summary, image, etc) and press Publish. Then in the WooBuddy Groups tab, you must select the group to which you want to give access.
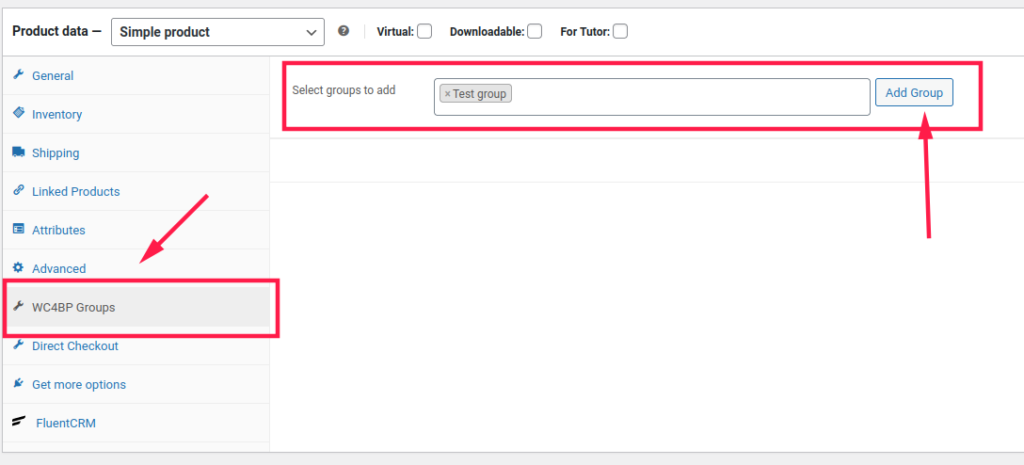
Once you have saved the changes you will be all set. This product will be listed in the store and once the user has made his purchase, he will automatically become a member of the group. You must take into account that the purchase process ends when the status of the order changes to complete. Once the payment of the order is confirmed in the orders tab, the status must be changed to Completed.

Bonus: Do you use LearnDash, Tutor LMS, or any other class and course manager?
If you use any of them you can give even more relevance to the paid groups since it is possible to link the paid group with one of your courses. In this way, those who have cancelled the subscription will be able to be aware of the activities and interactions of the group. For example, in Tutor LMS within the course settings, you will find the BuddyPress Groups tab in which you can enable this feature for one or more courses.


0 Comments